Post-production on the fourth episode of my sci-fi film series “Fallen Star” took considerably longer than previous episodes, mostly due to the sheer volume of shots that needed VFX work. As you’ll see in the video below, I certainly had my work cut out for me. In this article, I’ll explain some of what I had to do here and why:

We start with a bit of background work on our ‘bridge’ set. This is a standard sort of shot in this series where I use chromakey to remove the green from the computer ‘screens’ and replace it with animated content that I’ve made. In this shot, I also have the rear door opening and closing. Since our door doesn’t really move, it’s done with VFX. I used rotoscoping to mask out the arm and chair of the captain, and dropped in some door layers over a rendered image of the corridor. The captain’s shadow near the bottom of the door was then drawn back on.

Our ship’s ‘briefing room’, meanwhile, was not a real room at all. The physical set was taken down long before we got to filming this scene, so we relied on the green screen system to put in a virtual background in post-production. The green screen wasn’t physically large enough to fully cover all the actors, so it had to be moved around during the shoot, and for the wide shots, extra rotoscoping was needed to mask in the actors on the edges of the shot. The room itself was a basic 3D model, but the table, chairs and cast were all real and on set together.

The next shot, in a corridor, didn’t feature all of the cast together (schedule problems) so they were composited in post production. The corridor, too, is virtual and this was one of many ship’s interiors that was created digitally. This breakdown shows how the layers were arranged and the filtering and colour adjustment that was needed to integrate everything.

Next we have a seemingly innocuous shot of the captain in his chair. But this was a particularly challenging shot to get right because I had to fix a continuity error. The captain is looking off to the right of the camera in the original footage, breaking his eyeline with the helm officer in the preceding and following shots. Maintaining directional continuity is important and something we should have got right on set. To fix it in post, I couldn’t just flip the whole picture because then the uniform would be reversed. I had to isolate just the top half (the head and shoulders) and flip them, keep them aligned with the bottom half for the duration of the shot, erase the collar pip and then draw on a new collar pip on the other side. Four shots were corrected like this and hopefully no-one was any the wiser.

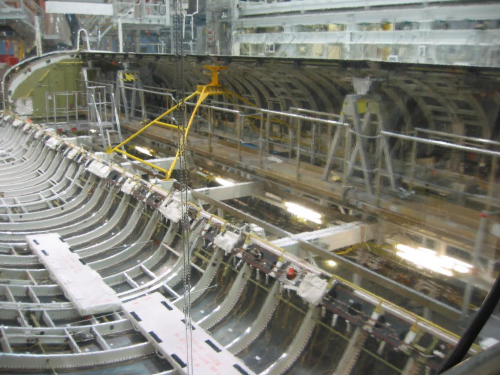
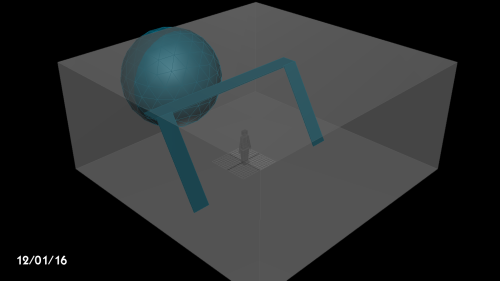
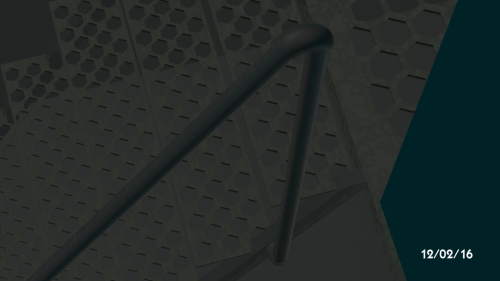
Next up, the engine room. This was the most difficult of the ‘virtual rooms’ to build, and was made with rather a lot of little details. I was particularly fond the pipes/cables trailing over the side of the engine ‘sphere’, as I hadn’t really attempted to model bendy shapes before. To get the size of the metal steps correct, I imported the footage of the captain and the placeholder ladder into the modelling software, and spaced the steps so they matched those of the ladder. When the final shot was eventually composited together, everything lined up beautifully.
I wanted to see as much of this engine room as possible in the final episode, so I included some wide shots. In these, the actors’ feet had to be masked out, because they go beyond the boundary of the green screen. The shot of the captain falling was a touch harder as more of his legs were outside the boundaries and I had to remove traces of the stool as well.

For all of these shots, to help avoid motion blur so I could extract a solid colour key, the shutter speed of the camera was set higher than normal. Without sufficient lighting to accommodate this, it led to some noise/fuzziness that had to be crushed out, and required motion blur to be added back in at the end. That’s in addition to the separate lighting pass, done using a pre-comped ‘silhouette’ layer and glow effects. Each shot had so much more post-processing and took longer to render than I was used to. I think it looks pretty good, though.

Next, we’re in a shuttle! The 3D shuttle model was created for episode 2, including the interiors; even though the interiors weren’t going to be shown at the time, I knew they would be needed eventually. To get the shot of me sitting in the cockpit, I actually attempted to transpose some 3D positional data from the model into After Effects. This didn’t quite work, however, and I ended up correcting it frame-by-frame for the final composition. The interior cockpit and exteriors were rendered separately and then layered into one another, and I made sure to raise the opacity of the window to 100% just in time to for the camera angle to change, otherwise it would be obvious that the pilot was a 2D element!

The crew sitting in the back of the shuttle were really sitting on little stools. We didn’t bother to work out the exact dimensions of the shuttle at the time of filming, but fortunately, none of the elements in this shot overlap, so I could adjust the width by moving them further apart or closer together without issues. This was another instance where several layers were needed for background elements, doors, shadows, reflections and lights. The bloom effect coming through the window is quite nice, I think.

The medical ward was created for episode 3 but, for its appearance in this episode, I had to flip the protruding base of the beds so that the bit that struts out is on the opposite side. This is because in episode 3 the characters are standing on the left hand side and in this episode they’re on the right hand side. Hopefully nobody noticed the discrepancy (until now)!

The episode starts getting rather ambitious around the time where the two astronauts start floating around and walking on the outer hull of the shuttle. The cost of building the space suit was such that we only made one – any shots where two are seen together are the result of compositing tricks. I would have liked to rig something up so that our actors could more convincingly ‘float’ – as it stands, their feet were firmly on the ground and the effect is lessened.

I knew early on I wanted to have a shot where Logan walks around the corner of the shuttle. After all, how else is one supposed to reach the adjacent walls? That said, I was surprised how simple this effect was to achieve. By setting the layer’s pivot point to the tip of the boot, I could just rotate the layer ninety degrees at the appropriate time. The hard part was putting shadows, lights and reflections in convincingly. The performance took care of the rest.

For shots where the spaceman was on the hull but small details weren’t necessarily visible, I decided I needed to model a 3D human. I cheated a little, admittedly, using a pre-made human shape for most of its figure. However, the suit’s components, chest piece, helmet, gloves, backpack, pipes and buttons were all my doing. This was the first time I’d attempted to map a ‘skin’ to a skeletal frame for animating, and it went rather well. Another skill to tick off the list, and something to work on in future. The little man wasn’t good enough to look at up close, but it’s convincing enough from a distance!

One of my favourite shots is seeing Logan kick a thruster to steer the shuttle away from the path of an asteroid. Everything about this shot makes me smile – the fact that it’s upside down, the fact that the asteroid can be seen approaching ominously, the fact that the entire background veers to the side as the shuttle turns, and all the nice lighting effects that accompany it. I genuinely can’t even remember how I went about putting this shot together, but it worked.

Sometimes, the simplest methods are the most effective. Our asteroids were very basic geosphere shapes with a couple of modifiers applied to them – “noise” and “meshsmooth”, as I recall. This added the random bumps to the surface, while the smoothing ensured it wasn’t angular and jagged. The texture was a simple rocky photo, while most of the heavy lifting was done by the strong light source. I often feel like I’m cheating when I hit that ‘render’ button and some amazing work of computerised art comes out the other end. Nevertheless, that’s how the asteroids were made.

When the security team arrives at the weapons locker, we had a ‘stage hand’ holding up the locker’s contents, the three laser guns that were to be picked up by one of the characters. As it happened, the scene was cut in such a way that the act of picking up the guns is never seen on screen, so the laborious process of erasing the stage hand would have been unnecessary after all.

The gigantic alien outpost was another instance where I felt I was cheating. This is the most basic shape imaginable, a cube with a few of its surfaces extruded. Literally all of its details are achieved through a randomised ‘greebling’ process. Greebles are the name given to the little bits and pieces added to models to make them look bigger, and 3DS Max can add them to any surface. Of course, when you get in close, you stop seeing as much detail, so the landing platform was a separate element, made much bigger and then shrunk down into the larger overall structure. I rather like how it turned out.

All of the scenes on the landing platform were done on green screen. Shots like this, where Logan slides off the wing, were faked. A small stool was used and most of the movement was added afterwards. We only had so much space to work with, but hopefully we gave the impression of much more.

Sometimes, you simply run out of space altogether. I wanted several shots where Logan and Jenkins run through corridors and other large rooms inside the outpost. The only way we could achieve this was outdoors, and so for these shots I had to rotoscope the entire duration. That’s a process of drawing around the parts of the picture you want to retain, in this case, the two runners. To get the best shot at the right speed, I used two separate takes and combined them. They were the most time-consuming shots to achieve in this whole episode and I must try not to make a habit of it!

The outpost interior corridors were another feature that felt like cheating. As per the exterior, most of the detail is added by the automatic ‘greeble’ effects. For the lights seemingly stuck onto the walls, they were actually another skin of the corridor, a bright blue one, just behind the black layer, and the slightly different greeble patterns made bits of it stick through. The whole thing appears strangely random and alien, which was the desired effect. The rendering time was rather severe for my meagre hardware, so this shot was the only one where the background geometry was rendered as an animation.

Next we have a morph effect, as the hologram transforms from an image of Humphreys to Logan. I’d never done a morph effect before but it was rather cool. The premise is to take take two images and distort each one using a ‘mesh warp’ so that all the important features line up with their counterparts on the other image. You end up with two rather grotesque creations as each image has been mangled to look like the other, but when you then cross-fade between them, it creates a smooth morphing effect. The hologram filters were then applied on top of all of that.

The star charts that make up much of the holographic display were not, I must confess, designed by me. These are some graphics I acquired from a tutorial on how to make ‘Star Wars style’ holograms. I put them to good use. After Effects can rotate layers in three-dimensions, and allow a virtual camera to pass through a scene. By positioning these graphics at distinct angles, I could make it look like one big 3D display.


The shoot-out in the corridor was another green screen job, and most of it was shot at different times, owing to actor availability. As you can see here, Darling and Davenport weren’t even in the scene together (their shoots were three years apart!), and the security team running around the corner was one of the very last things we shot for this episode.

Finally, the spy Volgin gets his comeuppance when he accidentally ejects himself from an escape hatch. No special rigs or ropes were required for this – the victim in question was simply photographed lying on the floor from above, and the photo manipulated to make the limbs wiggle a bit as the whole layer was transformed into a smooth sweeping motion, moving away from the ship. By duplicating and flipping this layer, I was able to add a shadow and reflection onto the hull. Finally, motion blur was added.
That about wraps up the VFX reel. This is just a highlight of the more interesting shots created for this episode – there were many more, some mundane, others spectacular. I would have to say that I’ve learned a lot from this project and I hope to continue to learn and improve as I move onto the next one. Thanks for reading.